Users
Create, edit and manage Joomla users from the frontend with search, filtering and bulk actions.
User list
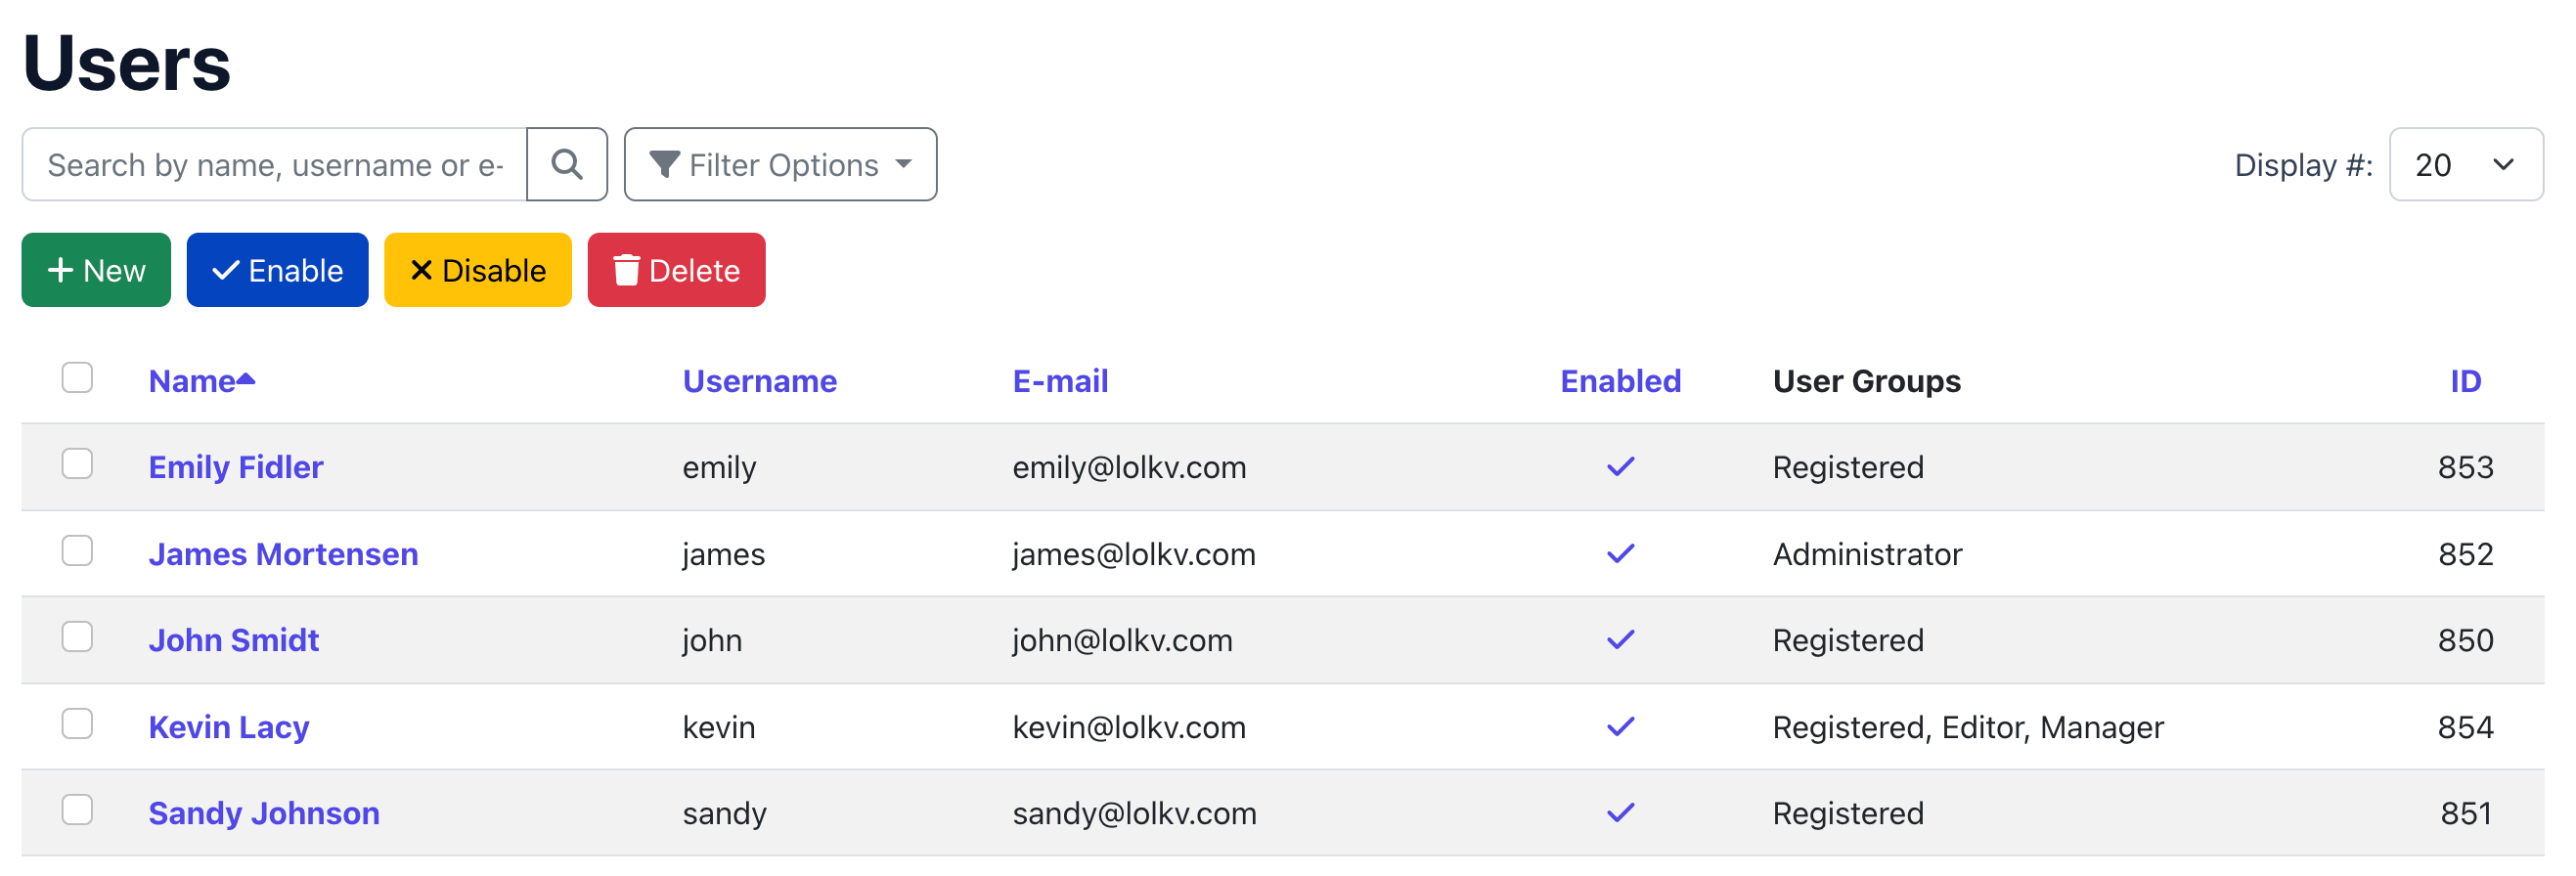
The user list is the default view when you open Frontend UserManager. It shows all users you have permission to see, with the following columns:
| Column | Description |
|---|---|
| Name | The user's full name. Click to edit. Sortable. |
| Username | Login username. Hidden when "Username is email" is enabled. Sortable. |
| Email address. Sortable. | |
| Enabled | Status toggle (enabled/disabled). Click to toggle if you have permission. |
| User Groups | Comma-separated list of assigned groups. |
| ID | Joomla user ID. Sortable. |
Search and filters
- Search — Searches by name, username and email.
- Status filter — Filter by enabled or disabled users.
- User group filter — Filter by user group membership (shown with hierarchical indent).
- Items per page — Control how many users are shown per page.
Creating a user
-
Click New User
Click the green New User button at the top of the user list.
-
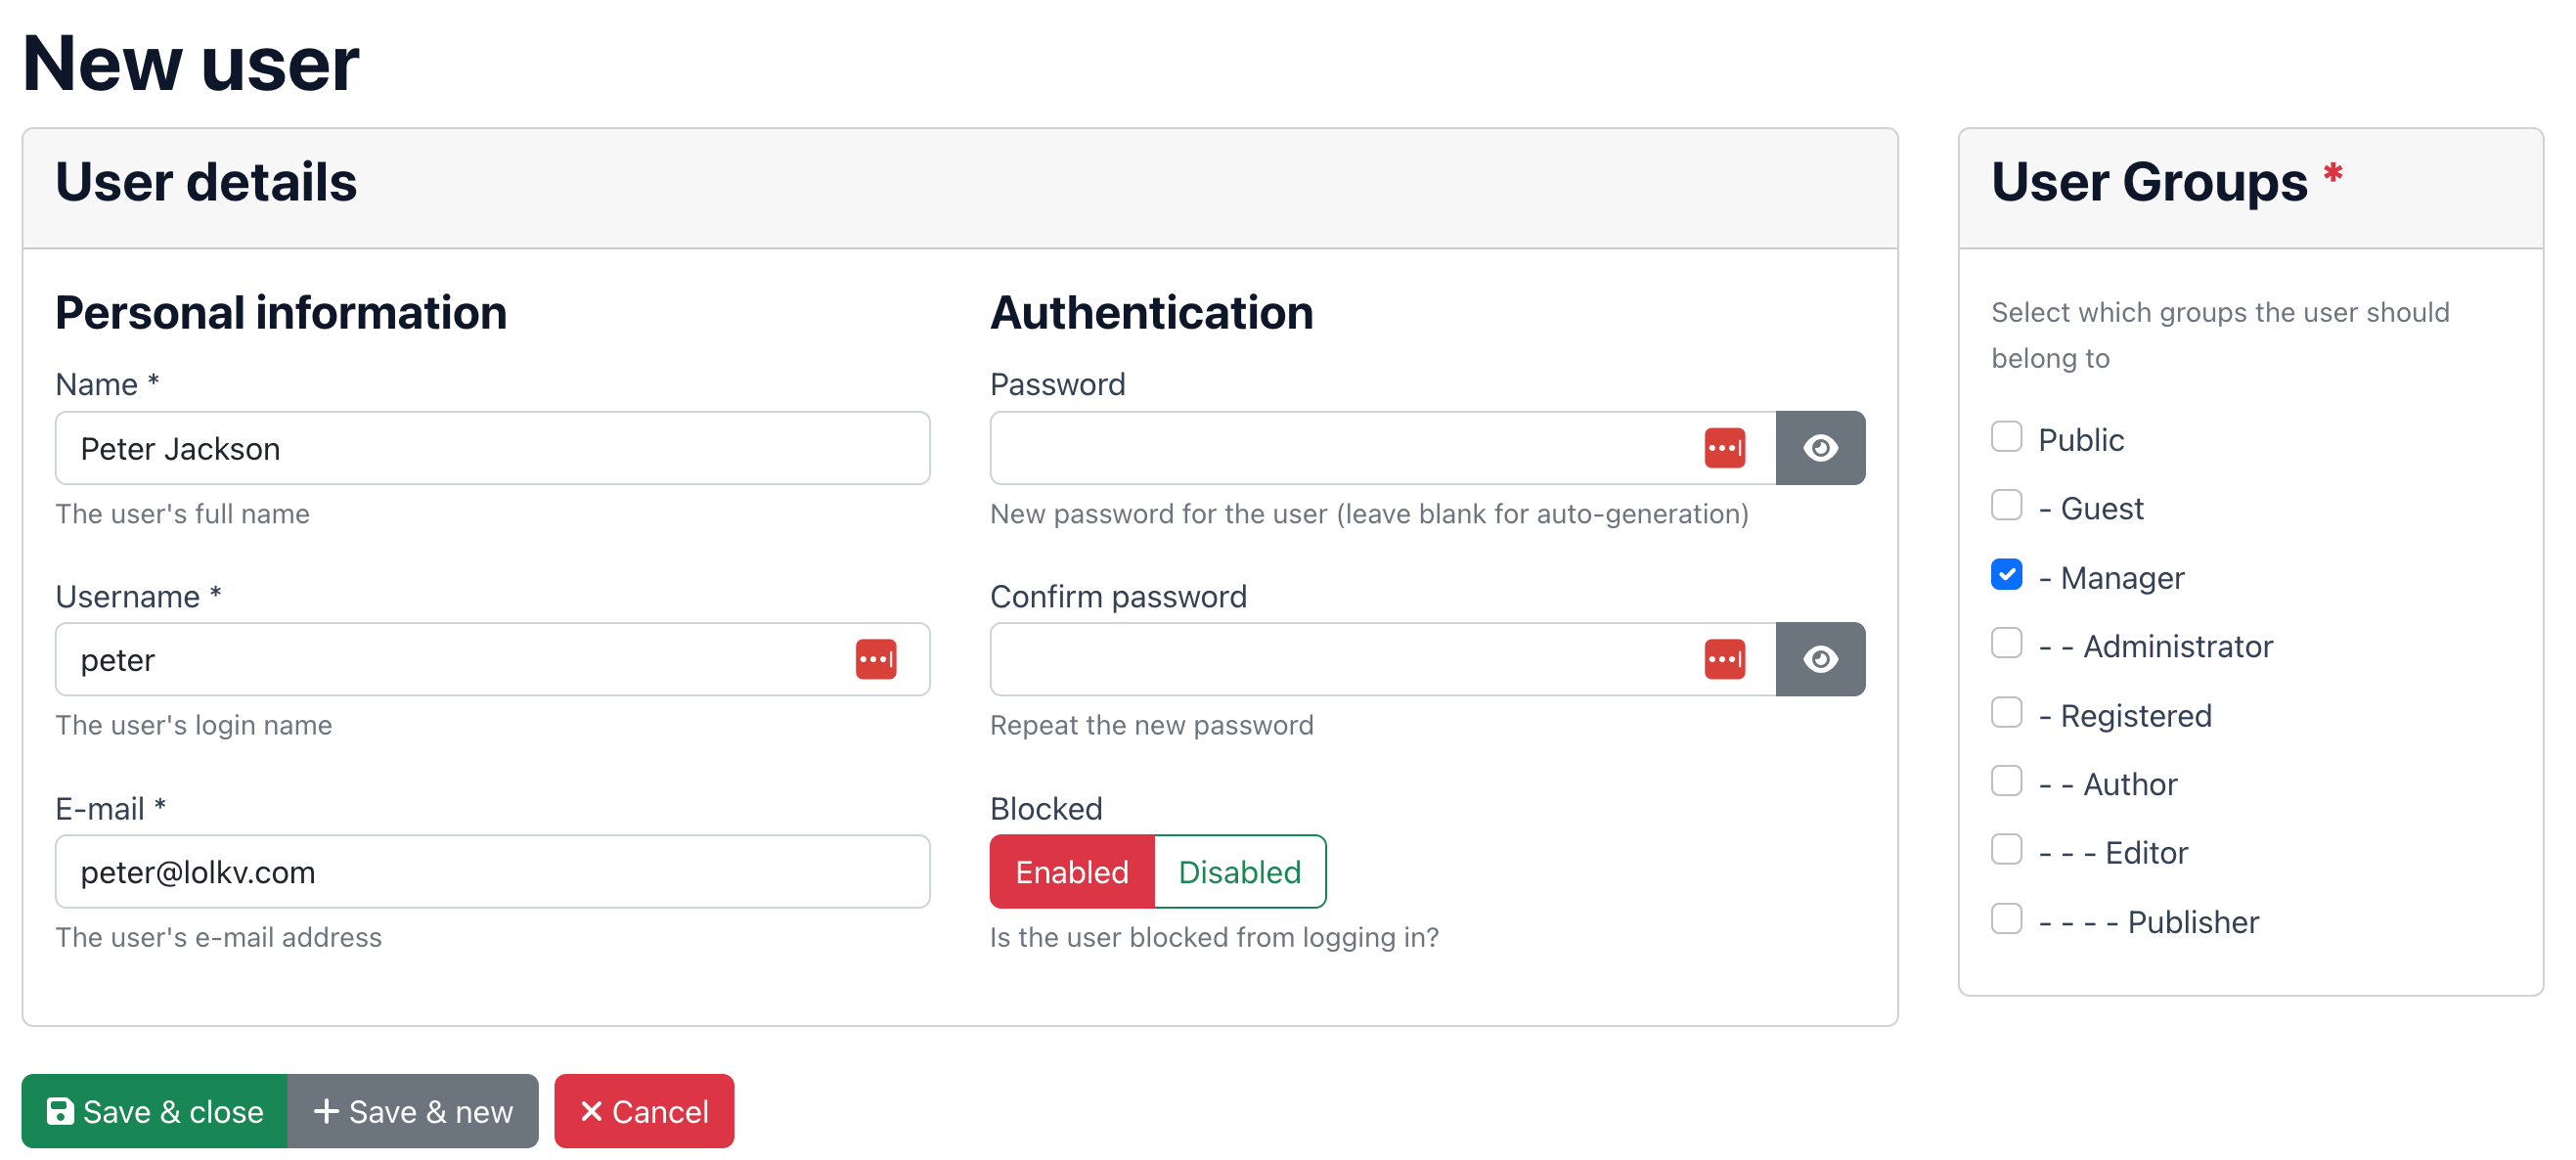
Fill in personal information
Enter the Name (required) and Email (required). If "Username is email" is disabled, also enter a Username.
-
Set authentication
Enter a Password and confirm it, or leave it empty to auto-generate one. Set the Status to Enabled or Disabled.
-
Assign user groups
In the sidebar, select at least one user group using the checkbox list. Groups are displayed hierarchically with indentation.
-
Fill in custom fields (optional)
If Joomla custom fields are configured for users (via Users → Fields in the backend), they appear as additional cards below the authentication section, grouped by field group.
-
Save
Click Save & Close to save and return to the list, or Save & New to save and create another user.
Editing a user
Click a user's name in the list to open the edit form. The form is identical to the create form, with these differences:
- The Password field is optional — leave it empty to keep the existing password.
- A hint text reminds you that the password only changes if you enter a new one.
- Existing custom field values are loaded automatically.
You cannot edit your own account, Joomla super users or frontend superusers through this interface. These restrictions exist to prevent accidental lockout or privilege escalation.
Welcome email
When a new user is created, Joomla can send a welcome email with their login credentials. This uses Joomla's built-in Mail Template system.
To configure the welcome email:
- Go to System → Mail Templates in the Joomla backend.
- Find the User - Account Details template (from
com_users). - Edit the subject and body to customise the message.
The welcome email can include the auto-generated or manually entered password using the {PASSWORD} placeholder. If you set passwords manually, make sure the user knows to change it on first login.
Bulk actions
Select multiple users using the checkboxes, then use the action buttons at the top of the list:
| Action | Description |
|---|---|
| Enable Users | Set all selected users to enabled status. Available if you have edit state permission. |
| Disable Users | Block all selected users. They can no longer log in. Available if you have edit state permission. |
| Delete Users | Permanently delete all selected users. A confirmation dialog is shown. Available if you have delete permission. |
Deleting a user permanently removes their Joomla account and all group memberships. This action cannot be undone. Consider disabling users instead if you may need to restore access later.
Custom fields
Frontend UserManager supports Joomla's custom fields system (com_fields). Any custom fields you create for the "User" context in the Joomla backend will automatically appear in the Frontend UserManager create/edit form.
Setting up custom fields
- In the Joomla backend, go to Users → Fields.
- Create a field group (optional but recommended for organisation).
- Create fields and assign them to the group.
- The fields automatically appear in the Frontend UserManager form, grouped in cards by field group.
All Joomla field types are supported: text, list, radio, textarea, checkbox and more. Field values are saved and loaded automatically using Joomla's standard field event system.
If no custom fields are configured, the form simply does not show the custom fields section. There are no errors or visual changes — the feature activates automatically when you create fields.